As with any major event in life, a little preparation can go a long way. In honor of Breast Cancer Awareness Month, we've connected with our friends at Stage, a shopping and wellness resource for the breast cancer patients community. Their team explained how they found calm in getting their space ready for breast cancer treatment and recovery.
With that in mind, we combined our knowledge to bring you tips for optimizing your home in the weeks leading up to treatment. We hope this helps you feel more prepared and takes a little of the stress out of the recovery process for you and your caregivers!
STAGE Surgery Preparation Tips
If you’re preparing for a double mastectomy, you should anticipate your mobility (and ability to care for yourself) to be limited in the weeks following your surgery.
Here are our top three ‘need to to know’ nuggets of information and some suggestions for optimizing your space in advance of your surgery for a smooth post-op recovery.
-
You won’t be able to lift your arms over your head for 6 weeks - which means cabinets and shelves will be hard to reach. You need to be careful not to reach or stretch your pectoral muscles too soon as it could compromise your reconstruction and or healing - we know, we learned the hard way. Also, if you have lymph nodes removed in your armpit (an axillary node dissection) and cording in your arm post surgery, it could be very painful to reach for items above eye level. If you live alone or won’t have assistance in the home at all times, consider moving plates, glasses, cups and dry goods to counter top level for easy access at mealtimes.
-
You won’t be able to lift more than 5 lbs for 4-6 weeks. So lightweight drink ware, plating and silverware are helpful.
-
Doors will be difficult to open - even the fridge - depending on the type of refrigerator you have, consider moving non-perishable items to easy to access pantry areas or countertops.
Our Kitchen & Pantry Organization Tips:
-
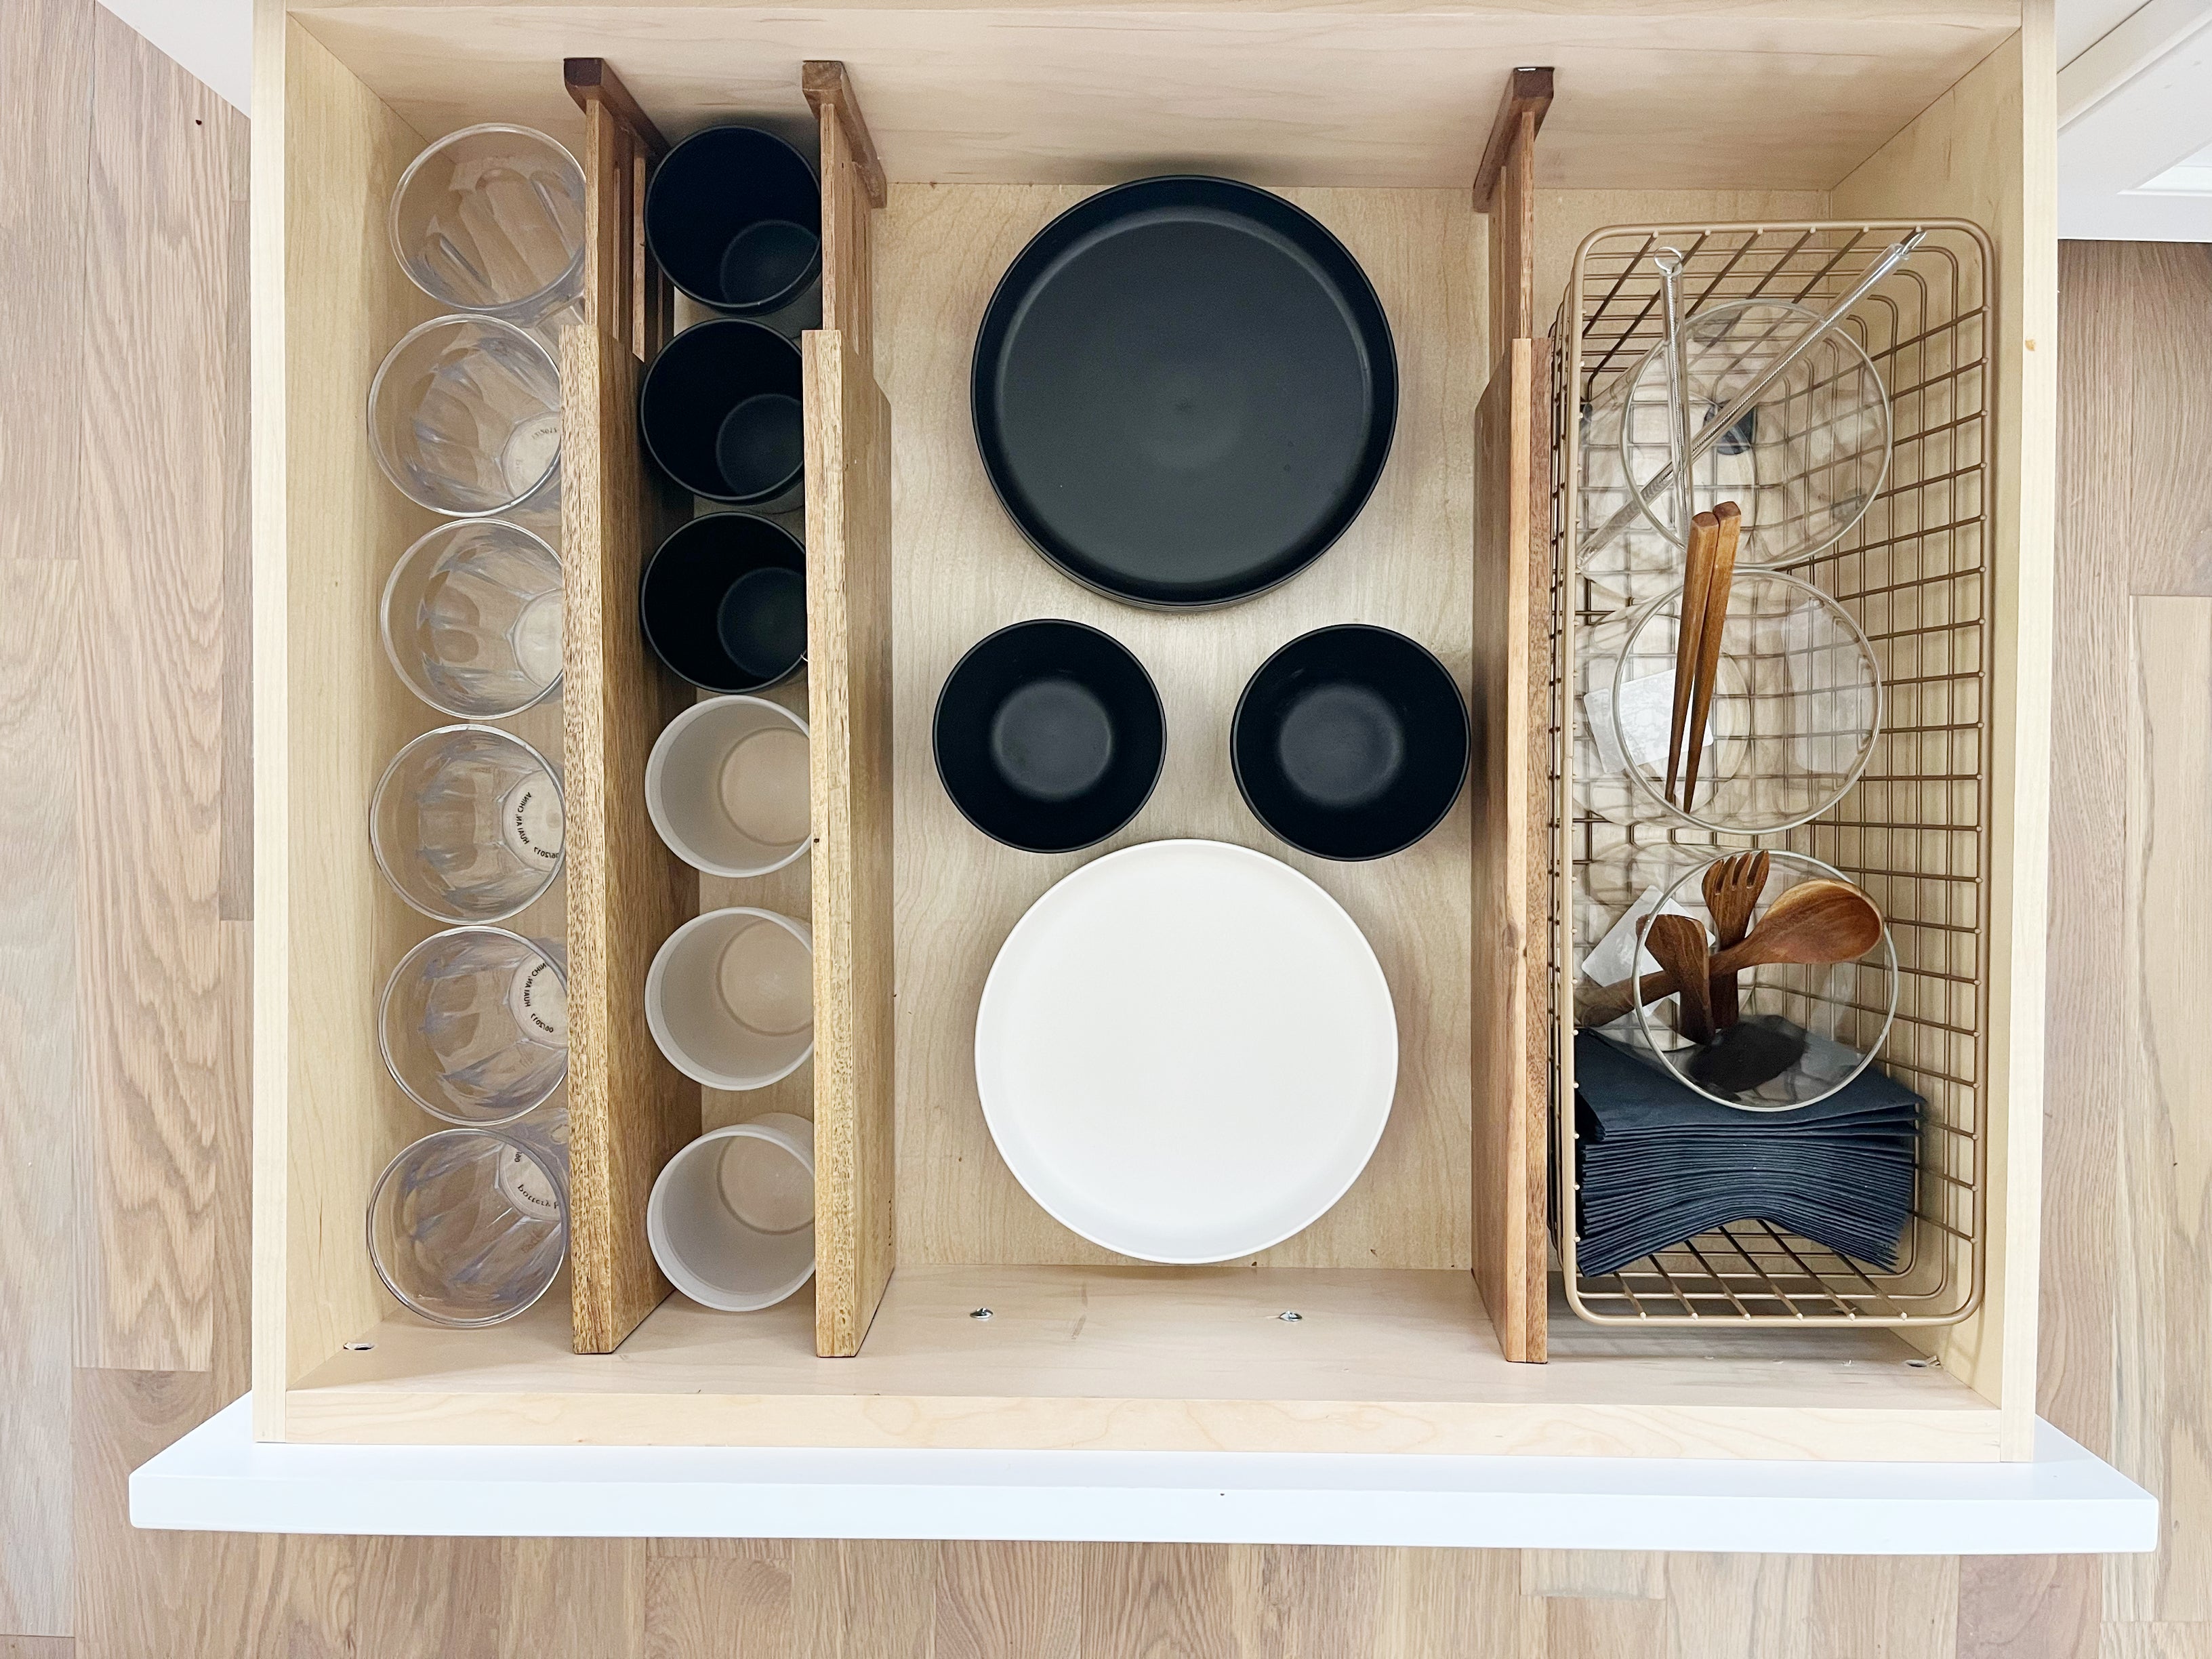
Lower dishes. Move lightweight plates and drink ware to a drawer at or below waist level, so it’s easy to reach. Give boundaries to those categories by using drawer dividers to separate dishes, cups and napkins. This will prevent items from shifting and ensure you won’t have to rummage through the contents. If your kitchen lacks drawer space, a basket or bin within a lower cupboard works similarly.
-
Relocate snacks. Set up snacks and non-perishable items on the counter top and/or in the pantry for easy access for you, as well as kids. Give snacks a designated home within a drawer or basket and make sure it’s labeled so everyone knows where to find them, and where to put them away after grocery shopping.
-
Corral lunch items. Make it simple for kids or other caregivers to pack lunches. The easier you can make it for your children to self serve, the better. Utilize baskets and labels to corral each category for a fool proof system that anyone can follow.
-
Toss expired food. Get rid of anything expired in your refrigerator prior to surgery and do a shop to replace essentials. Again, adding labels will make it super easy for anyone (who isn't you) to locate what they need, so consider adding label tape to refrigerator drawers and shelves.
-
Repurpose junk drawer. While the “junk drawer” (or what we like to call the utility drawer) is essential, now is a great time to repurpose it for more important recovery items. It’s a perfect home for drain output records, medication schedule, pills, etc. An expandable drawer insert is a simple way to keep everything organized, divided and at your fingertips.


These tips above also help when your energy may be lower due to chemotherapy and radiation. And, when you suddenly find yourself with a blossoming collection of hats, scarves, turbans, new bras, foobs and more, here’s our suggestions for making them easy to find in your closet.
Our Closet Organization Tips:
-
Do an edit. Take everything out of your drawers, so you can edit and get rid of items you no longer need. Keep in mind that you’ll want tops with buttons, zippers and wide necklines close at hand for easy port access while in recovery. Anything cozy and easy to pull on will also likely be worn on repeat so hold on to loungewear and pajamas.
-
Categorize. Group similar items together on your closet rod or within drawers to separate your categories and make it easier to find what you need. Place categories you don’t anticipate wearing during recovery at the back of your closet.
-
File fold. Fold clothes to the height of your drawer and place them upright in rows. This will not only save space but will allow an easy visual of everything you own in one glance. You can make it even easier to find what you’re looking for by color coding.
-
Divide your drawers. Use drawer dividers to prevent shifting and keep your categories in their “zones”. We especially like using them between rows of file folded clothes.
-
Prioritize recovery accessories. Place turbans, scarves, hair accessories, and other recovery essentials in categorized bins on lower shelves to prevent reaching. Add labels as a reminder of what goes where. You’ll be accessing them frequently so don’t be afraid to prioritize their placement over other categories.


GET THE LOOK


We hope these tips make updating your home fun - but please don’t feel pressured to tackle it all at once. Pro tip: Enlist help from supporters who may need something to do while you’re resting!
Disclaimer: recovery times may vary by individual patient - some will recover in less time, some will take longer. Work with your surgeon to best understand what you can expect given your exact procedure. We provide this information as a rough guideline only.
xx,
the NEAT team & Stage's Virginia Carnesale


